
Digital whiteboarding – Creating quality digital learning materials fast!
Throughout my career, I have often had the opportunity to assist face to face educators in transitioning their classroom-based lessons and materials into digital education. As designing digital learning can require different instructional approaches, there are times where out of the box thinking is required to ensure the learning outcomes are retained while creating learning materials more suited for the digital education environment.
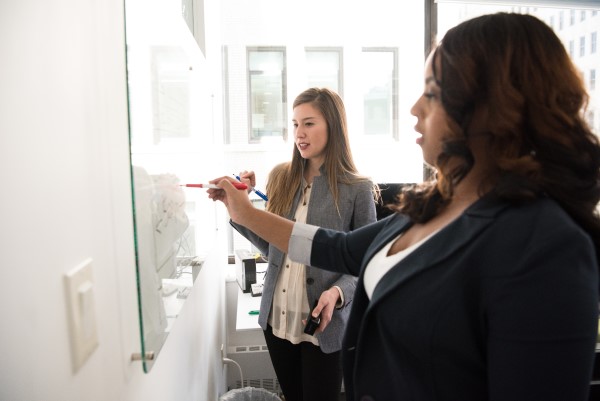
One such challenge is the transition of an educator in a traditional classroom environment explaining important concepts at a whiteboard. We’ve all sat in classes during our lives, with the teacher drawing diagrams and explaining key concepts at the front of the room. The question is how do we replicate that experience in a digital environment. Unlike many course materials that have to be completely rethought to achieve optimum learning outcomes in a digital environment, transitioning this style of teaching can be achieved quite easily using something I’m going to call “digital whiteboarding”.
Screen recording without audio
In the past, you may have drawn a diagram, stepped out some key calculations or added other content up on the board to explain a concept to your students. This is still possible in the digital space, using screen recording.
Screen recording is the video capture of things happening on a computer desktop. Most often we see it used to show us how to use a program or give a demonstration of a website, we see everything on the person’s desktop and can see everything they click on, open or view. But with a little lateral thinking, the same technologies can be used to create a “digital whiteboard”.
Screen recording tools can typically capture your whole desktop, a particular program, or subsection of the screen chosen by the user. The ability to capture a subsection is particularly useful for recording a “digital whiteboard”.
To create your board you will need access to a screen recording tool. There are many commercial packages out there (eg. Snagit and Camtasia), as well as a number of free tools (eg. ShareX) each with varying functionality and quality. Some operating systems even come with built-in recording functionality.
As well as a screen recording tool, you will need access to a pen-based computer/tablet. While not essential this will make the drawing and writing process much more natural.
On your device, you will then need to create your workspace. Opening up a tool which allows for pen-based content, such as Microsoft OneNote or even Microsoft Paint. What you are looking for is a nice big white space where you can draw and write.
Once you have your workspace open, all that is needed is to start a screen recording, ensuring you capture only a subsection of the screen (ie. your “digital whiteboard” space). When the recording begins use your pen to create any drawing, diagrams, text etc as you would normally do on a physical whiteboard in a classroom. When you are finished, all you need to do is stop the recording, save the video in your preferred format and you have an instant learning resource. And all in the time it took you to complete a simple drawing/diagram.
Screen recording + audio
Thinking back to those times you may have taught in front of a whiteboard, there are a lot of times where what you are saying to your students is just as important as what you are writing/drawing on the board.
But it is ok, you can still transition these lessons online without losing your message. There are a number of screen recording tools that allow you to not only capture your screen but to record audio at the same time. You’ll need a good microphone, a screen based computer/tablet, a program with white space where you can draw (eg. OneNote) and an audio-capable screen recording tool (eg. Camtasia).
Graphic recording
If you want to capture presentations and distil them down to their key messages in a visual and engaging way for use as a digital learning resource, graphic recording may be an option.
Graphic recording is when you capture spoken messages and create a visual representation using a combination of graphics and text. This can be achieved using the screen recording techniques mentioned previously, or alternatively by the use of time-lapse animation.
Time-lapse animation
While graphic recording is traditionally done using pen and paper, using digital media opens up additional opportunities for creating and displaying content. One benefit is the ability to automatically create time-lapse animations from your drawings/notes. All you need is a screen based computer/tablet and a drawing tool with time-lapse recording capability (eg. Procreate).
I have used graphic recording techniques previously to capture key messages from a presentation on AR/VR. Instead of taking traditional pen and paper notes, I used my iPad and an iOS drawing program called Procreate to sketch/doodle key messages throughout the presentation. This tool automatically recorded every stroke and change I made. At the end of the presentation, all I needed to do was save the video and I had an animated learning resource ready for sharing with anyone wishing to learn more about the subject.
I have included the final video below so you can see an example of what is possible using this approach.
Creating quality digital learning materials fast!
“Digital whiteboarding” allows for the rapid creation of quality learning resources. However, just as when you use a whiteboard in a physical classroom, it does not have to be perfect. It is not about your drawing ability, it is about getting the learning message to your students in the most appropriate way. If your learning materials would be best suited to being explained in a visual or animated format then “digital whiteboarding” via screen recording or time-lapse animation may be an appropriate option.

- Bringing learning to life through storytelling – 20th April 2021
- Move away from your monitor and take your digital learning on the move – 20th March 2021
- The rise of QR codes – Is now the time to utilise these in our learning experiences? – 20th February 2021


What a great post!
I used to draw on the board and flip charts like crazy as a classroom teacher.
Now my (much reduced) Teaching is 100% online.
But I have an iPad Pro and Apple Pencil, because I thought this might provide me a way to capture drawings and use in courses some way.
I have to admit this has rarely happened.
I don’t know if it’s laziness on my part, whether the process is too awkward, or I’m just too busy to fit this in?!
Thanks for reminding me to revisit this area…
Thanks Stuart! One of the things I really like about creating digital whiteboard style resources is how quickly you can create them. Makes creating engaging, effective resources nice and easy!