
Git for Moodle Admins, Part 3
In this post, learn how to add Git submodules to your Moodle admin skillset.
So far in our series of Git for Moodle admins we’ve learned some basic Git commands to clone the main Moodle repo and to push and pull between local and remote repos. Moodle is a modular system, so now it’s time to think about how we’re going to manage all of the plugins and themes that allow us to customize and extend the platform.
The normal method of installing plugins involves downloading a plugin file and adding it to your Moodle, either through the Admin->Install Plugins page or by adding the folder directly to your server. But what if you have a large site, with a lot of plugins to install and keep up to date? What if you need to manage multiple test and production servers, or a cluster of Moodle servers, all of which need to run the exact same set of plugins at the same version? You would need a powerful way to manage your plugin code. My friend, you need Git submodules.
What is a submodule? It’s a way to keep a set of Git repositories as a subset of a larger project. For Moodle admins, this is essentially a way to manage a specific set of plugins at specific versions. Our main project will be the core Moodle code, and any plugins can be added as submodules.
I’ll warn you that Git submodules have a bit of an unsavory reputation. If you start to use submodules without taking the time to understand how they work, it’s easy to get into trouble. A lot of the information on submodules that you’ll find online is aimed at developers, and it may be confusing for Moodle admins as to how best to employ them to achieve our own goals. That’s why I’m creating this article specifically for Moodle admins to benefit from the power of Git submodules.
Adding a submodule
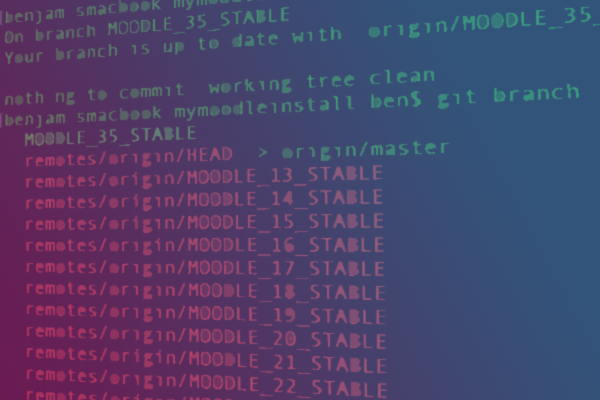
If you followed along with the previous post in this series you’ll have a folder named mymoodleinstall with Moodle 3.5 downloaded via Git. Open your terminal and navigate to the mymoodleinstall folder, and let’s go ahead and try adding the Scheduler plugin as a submodule to our project.
git submodule add -b MOODLE_35_STABLE https://github.com/bostelm/moodle-mod_scheduler.git mod/scheduler
Again, you’ll see Git doing its thing and cloning code into a folder. What did we do here?
- git submodule add is the Git command to add a new submodule
- –b is an option you can pass to the ‘submodule add’ command to specify that you want to track a particular branch of the repository, in our case for the Moodle 3.5 compatible version of the plugin
- The URL is the location of the plugin version control page
- mod/scheduler is the relative path to install the plugin. Note this is not arbitrary. Plugins must be installed to the correct location in order for Moodle to function properly. You can usually tell where to install a plugin from the Frankenstyle format of the name.
This video walks through the process in more detail:
Once you’ve successfully added the scheduler plugin, try adding another plugin or two for practice. Browse the Moodle plugins repository to find something interesting. Hint: from the plugin page you can always find a link to the Source Control URL that will direct you to the link you need to add a plugin as a submodule.
Understanding .gitmodules
Once you’ve added submodules, you will notice a new hidden file called gitmodules in your mymoodleinstall folder. Think of the gitmodules file as the manifest that lists all the plugins you want to be installed on your site, where they come from, and what directory they should be in.
After installing the scheduler activity and the configurable reports block, my .gitmodules looks like this:
 [submodule "mod/scheduler"]
         path = mod/scheduler
         url = https://github.com/bostelm/moodle-mod_scheduler.git
         branch = MOODLE_35_STABLE
 [submodule "blocks/configurablereports"]
         path = blocks/configurablereports
         url = https://github.com/jleyva/moodle-block_configurablereports.git
         branch = MOODLE_36_STABLE
You can inspect your gitmodules file and verify it looks similar to the above. Then, from the root of your mymoodleinstall folder, run the git status command to check the status of your project.
git status
You should see output like this:
 Your branch is ahead of 'origin/MOODLE_35_STABLE' by 1 commit.
   (use "git push" to publish your local commits)

 Changes to be committed:
   (use "git reset HEAD <file>..." to unstage)

         new file:   .gitmodules
         new file:   blocks/configurablereports
         new file:   mod/scheduler
So what’s happened? You’ve made a change by adding submodules, so your project has now diverged from the core Moodle code. This is good! You’ve now customized your project with plugins. The gitmodules file is your plugins manifest, and you’ll also see changes in git for the plugins themselves – but notice that your main Git project is not concerned with tracking each individual file inside your submodules.
Let’s go ahead and stage and commit your changes. We won’t cover these commands in-depth here, but feel free to read up on them in the Git manual.
The following command will “stage” and “commit” your changes and add a commit message in one go:
git commit -a -m ‘Added some plugins as submodules’.
Now push your committed changes to your remote on GitHub. (Remember, in the part 2 post I named my remote “myuni” – you can double-check yours by running git remote -v)
git push myuni
Now what?
You now have a Moodle repo with a custom list of plugins you can manage as submodules, meaning you can update or change the core Moodle code and any submodules independently of each other. Here are some quick commands you would use going forward:
Update your plugins
I’ve seen some people go into a plugin/submodule folder to do updates; for instance, you can go to the mod/scheduler directory and run commands like git status or git pull.
DO NOT DO THIS. Remember we are using the gitmodules file as our “manifest” or list of plugins complete with which version we are running. Making changes inside each submodule defeats the purpose and will lead to a lot of confusion and/or extra work (ask me how I know!)
Instead, when you want to update plugins, just run this command from the Moodle root:
git submodule update --remote
This will go through your gitmodules file and make sure that you have the latest available version of each plugin from the branch on the remote repo you are tracking. When you have dozens of plugins running on multiple servers this is a great time saver.
If you only want to update a specific plugin, just pass the plugin path to the update command:
git submodule update --remote mod/scheduler
Clone to another server/location
To grab your code (including all plugins in the download), run the git clone command and include the –recurse-submodules option
git clone -b MOODLE_35_STABLE https://github.com/thebenkahn/mymoodleinstall.git --recurse-submodules anothermoodleinstall
Don’t forget the recurse-submodules flag, or your going to have a bunch of empty plugin folders and won’t be able to install Moodle properly until you go back and initialize them.
If you do forget and have problems you can run:
git submodule init

git submodule update --remote
Update or remove a submodule from your repository
If a plugin changes Git URLs or you need to start tracking a different branch (for instance when updating your core Moodle to a new major version), follow this process:
First, open the gitmodules file and edit the needed properties for the remote URL or branch name.
Then run these commands:
 ##sync gitmodules changes to project
 git submodule sync path/to/submodule

 ##pull in new branch/remote code
 git submodule update –-remote path/to/submodule
To delete a submodule:
 # Remove the submodule entry from .git/config
 git submodule deinit -f path/to/submodule

 # Remove the submodule directory from the superproject's .git/modules directory
 rm -rf .git/modules/path/to/submodule

 # Remove the entry in .gitmodules and remove the submodule directory located at path/to/submodule
 git rm -f path/to/submodule
After making any of the changes above in your test environment, don’t forget to commit and push your changes to your remote repository.
Wrap up
In this post, we started learning how to use Git submodules to manage Moodle plugins. Submodules can definitely take a bit or practice to get the hang of. But once you get the hang of them they can be an extremely powerful addition to your Moodle admin toolbelt. In our final Git for Admins post next month, I’ll demonstrate how Git and submodules can support a smooth and quick process for applying or even automating updates to your Moodle servers.

- Using Moodle to Respond to Changing Needs – 19th July 2020
- Some Office 365 favorites – 19th May 2020
- Moodle PDF Conversion Plugins: Good, Bad & Ugly – 19th April 2020


Hello, how would the upgrade process proceed then? If I switch to a higher branch, will I lose the .gitmodules file (and therefore the ability to manage it)? Or is it necessary to add this file to ignored files before switching branches?
Wow – what an great post !
So much here, and I for one need to read through and learn git a lot better !
Nice video too 🙂