
Video
Introduction
If a picture can speak a thousand words, then what about video? In this post I’m going to briefly describe the open source and free video editor Kdenlive.
Disclaimers
VirtualBox® and Oracle® are registered trademarks – www.oracle.com/legal/trademarks.html and www.virtualbox.org/wiki/Licensing_FAQ.
Other names / logos can be trademarks of their respective owners. Please review their website for details.
I am independent from the organisations listed above and am in no way writing for or endorsed by them.
Installing
Even though as you can see from its Wikipedia entry, en.wikipedia.org/wiki/Kdenlive, Kdenlive is available for many platforms, I have found it temperamental on Windows. So I decided to run it on Linux within a virtual machine. In that way, if it crashes then all you do is reboot the virtual machine and not your own, combined with the fact that it’s primary platform is Linux, specifically the KDE desktop environment. The disadvantage is that when working with video you need memory and with a virtual machine setup you have a ‘machine within a machine’, so you need even more! Fortunately I have 16GB installed, which seems fine at the moment. So give the virtual machine as much ram, video ram and CPU’s as you can.
Therefore after a bit of hunting around for a KDE based Linux distribution, I found KDE Neon – neon.kde.org. After you’ve got a virtual machine installed and running in, for example, VirtualBox (www.virtualbox.org), then install with ‘Discover’:

With VirtualBox you should install the guest additions so that the screen is bigger, so docs.oracle.com/en/virtualization/virtualbox/6.1/user/guestadd-install.html – then ‘View’ → ‘Adjust Window Size’.
As we need to transfer files between the virtual machine and our own, then we can use SSH. As this is over the network then choose a ‘Bridged Adapter’ in VirtualBox (docs.oracle.com/en/virtualization/virtualbox/6.1/user/network_bridged.html) then your router should issue an IP address on the same network as your own machine. For this we will need ‘tasksel’ to make the installation of ‘SSH server’ simple:

then run and use the cursor keys to move, space bar to select and tab key to get to ‘OK’:

now all we need to know is our machines IP address, so install ‘net-tools’:

then we can run ‘ifconfig’ and get our IP, the ‘inet’ one, this needs to be the ‘ethernet’ interface, not the localhost one, which can be 127.0.0.1:

Note: I’ve highlighted but masked the area where you need to look as its private.
Now we can use something like WinSCP (en.wikipedia.org/wiki/WinSCP) to transfer files, such as our source files and get the output.
Impressions
There is a lot to like about Kdenlive, I’ve tried quite a few applications for when I create my videos and used to use ‘Windows Movie Maker’ (en.wikipedia.org/wiki/Windows_Movie_Maker) until it was discontinued. But never found they did exactly what I needed.
As an example of the main screen, here’s an example of my video, youtu.be/tVXcQEJFqB8:

where you can see that there is everything you need to have, such as titles, transitions, a copyright overlay, colour and audio adjustments. With multiple tracks, you can overlay clips and add transitions. Its easy to see what effects are on a given clip as they are shown by text on the clip in the track.
My only real issue is reliability, it can be a little buggy for me, but saving regularly and rebooting the virtual machine helps. It has in recent months got better.
To learn more about installing and using Kdenlive, please see: userbase.kde.org/Kdenlive.
Recording audio and video
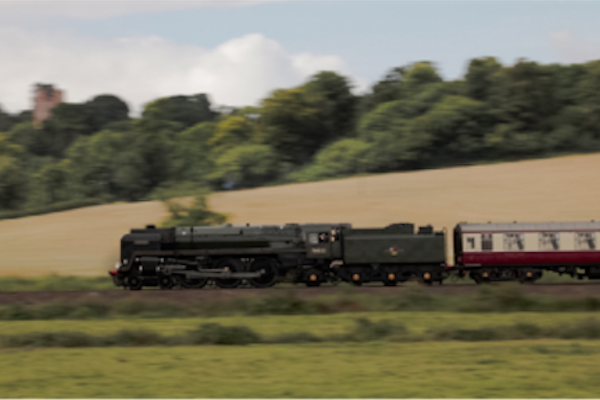
From my experience and research of recording video with a DSLR, you need a shutter speed that is twice the frame rate in order to get the motion correct motion blur. So if you’re shooting at 25 frames per second then you’ll need a shutter speed of 1/50th of a second. This often means that in normal daylight that the image will be over exposed, so a two / three stop ND filter is needed. And if you’re recording outside, an external microphone with a ‘dead cat’ wind shield really helps to cut down the wind noise, such as the Rode VideoMicro → www.rode.com/microphones/videomicro.
But what about screen capture? I’ve used a commercial product for years, but in researching this post I’ve come across ‘OBS Studio’ (obsproject.com) which records and streams as well. A quick experiment finds that you can record the webcam and screen at the same time, separate them with a background and have only a part of the screen showing. Perhaps a subject for a future post.
Copyright
Clearly you need to own or have permission to use the content for the use you intend, so thus commercial or non-commercial. But what about the font you employ in the text? You can find ‘SIL Open Font License’ licensed – scripts.sil.org/ofl – such that you can find on ‘FontSquirrel’. For other content like images and icons there is ‘Pixabay’ (pixabay.com) and ‘Iconfinder’ (www.iconfinder.com).
Conclusion
Kdenlive as lots and lots of features that will help you create videos to suit and educate your audience, so worth a look.
References
- Kdenlive – kdenlive.org/en and userbase.kde.org/Kdenlive
- KDE Neon – neon.kde.org
- FontSquirrel – www.fontsquirrel.com
- Iconfinder – www.iconfinder.com
- OBS Studio – obsproject.com
- Pixabay – pixabay.com
- Rode VideoMicro – www.rode.com/microphones/videomicro
- SIL Open Font License – scripts.sil.org/ofl

- Rolls in fridge – 16th June 2026
- Learning never stops – 16th May 2026
- Uniformity – 16th April 2026


Nice post Gareth !
I used KdenLive many years ago, when I was first experimenting with Linux (using Mandrake and then Mandriva).
It looks like it’s come a long way now though 🙂
I’m surprised how much like Camtasia the UI is now !
Now I’m trying to make time to spin up a decent Linux desktop at home again to try this 😉