
Images
Introduction
They say that a picture speaks a thousand words, en.wikipedia.org/wiki/A_picture_is_worth_a_thousand_words, but where do you get your images for your courses and online posts from? In this post I’ll describe where I source mine and how they need to be processed for the web.
Disclaimers
I am independent from organisations mentioned and am in no way writing for or endorsed by them.
Names / logos can be trademarks of their respective owners. Please review their websites for details.
The information presented in this article is written according to my own understanding, there could be technical inaccuracies, so please do undertake your own research.
Additional references
- ‘Auto-resize every uploading images’ – moodle.org/mod/forum/discuss.php?d=399815
- Moodle – moodle.org
Sources
With pictures and images, like words and other creative works, ‘copyright’ is a factor in their use. Therefore you have three options:
You
Digital cameras are everywhere, so just take the image yourself (as long as you abide by local laws). Then copyright is not an issue, or example, most of my posts ‘featured image’, that you see at the top, are pictures (or stills from a video) I’ve taken. Then you can copyright the image and choose a licence that suits you, for example ‘Creative Commons’.
But what if you can’t create the image you want? Then we have the next two options:
Asking permission
You’ve searched the web and have found exactly what you want, however it is copyrighted and does not have a licence such as Creative Commons that possibly lets you use the image. Therefore your only option is to reach out to the owner of the image, describe to them what and why you want to use the image, hope that they reply and do give you permission. Often they will ask you to credit them, but this is not much additional work.
If a search doesn’t find anything, then another option is to look at a collection site, and that’s our last option:
Collections
These are websites that collate images from various sources and people who upload, share and licence their work, such as ‘Pixabay’ and ‘Iconfinder’. The key thing is to always check the licence and terms to ensure you can use it.
The web page
To state the obvious, you interact with Moodle (not the mobile app) as a view web pages on a web browser on some sort of display. That display has a resolution, en.wikipedia.org/wiki/Display_resolution, and so do images / pictures you take on your digital camera, however the camera’s sensor is measured in ‘Megapixels’, and so we now have a relationship between the size of image a camera can take and the size of the display for which it will displayed on. If we take a current extreme that you’re learning on a 4K monitor, then that will have a resolution (16:9 ratio) of 3840 by 2160 pixels, en.wikipedia.org/wiki/4K_resolution, which equates to 8.3 megapixels, which is less than you would find on a typical mobile phone these days, as 12 megapixels with a 3:2 ratio would be 4256 by 2848 pixels. My APS-C DSLR has a 24 megapixel sensor, and that has a resolution at a 3:2 ratio of 6000 by 4000 pixels.
Now, I don’t want to get into the debate about differences in quality of images between DSLR’s and mobile phones, there are explanations such as ‘Camera – definition’, ‘Camera megapixels: Why more isn’t always better (Smartphones Unlocked)’ and ‘Why camera sensor size is more important than more megapixels’, as that’s not the point of this post. The key thing here to us is the resolution and size (bytes) of the image we want to use, as we need to consider how big the image actually needs to be for the web page and that it takes the least amount of ‘Bandwidth’ to get from the server to the client (The first step – part one) and therefore reduce the page load time. This is purely because we don’t actually need that big an image on our web page.
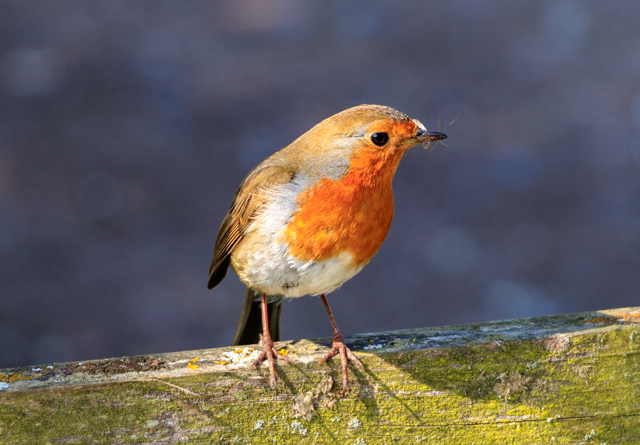
If we consider a picture we’ve taken, then that is typically in ‘JPEG’ unlike for a screen-shot which is better off in ‘PNG’ because of the way the compression is applied, another story, then this post’s featured image (128:89 ratio) has an original size of 3.82MB (4,014,636 bytes) and a resolution of 3053 by 2123, and yet only needs to be 640 by 445, and so this means it has a file size of 249KB (255,753 bytes), a reduction of around 93.5%! Therefore before using our chosen image, need to make a suitable web based version.
Optimising for the web page
To make this happen, we have two options:
Manual
All that we need to do is use our favourite ‘graphics editor’ and create a suitably sized version of the image, and taking into account the ‘quality’ that it can be as perhaps you don’t need a high level as you would for printing. However, these days with improvements in display technology, then perhaps you actually do, so start with the default quality setting and see how that is.
In addition to the file formats we are familiar about, there is a new one called ‘WebP’, that you can read about in my post ‘WebP‘.
Automated
As an alternative, we can automate the process by using the ‘Image optimiser’, this capable of not only optimising the images, but also ‘Lazy loading’ them too, so that only the images that you need to see will be sent to the web browser.
And finally…
There is also the ‘srcset’ attribute whereby you can specify different image files with their width so that the browser can decide on the most appropriate to display. At the moment though, I’m not quite sure how this can be easily used within the Moodle editor.
Conclusion
What do you think? Please let me know in the comments.

- Rolls in fridge – 16th June 2026
- Learning never stops – 16th May 2026
- Uniformity – 16th April 2026


Pingback: Static images - ElearningWorld.org
Nice little overview.
I’m surprised how many teachers and content designers don’t size images appropriately for online courses.
Thanks for this very informative post. I will share it with fellow EFL teachers who use Moodle to create their own activities.